This isn't an original craft by any means but it was a lot of fun so I thought I'd share. It all started when I was scheduled to be the project parent for preschool a few weeks ago. Monkey had regaled us with stories of how one day he and his friends were butterflies at school and they "migrated" to the gym and back. He thought it was pretty cool so I decided we'd make butterflies on my day that week. Google never lets me down - so Phase I of the Coffee Filter Butterfly project was implemented. But one day of butterflies wasn't enough for Monkey. He decided he wanted a "whole bunch" and that we needed to hang them in his room. So I got some supplies and we set to work. This time it was serious. He was determined to make an entire "army" of butterflies.
Besides being a super cute end product the "getting there" portion of this craft is rife with learning possibilities (and just plain fun).
So here's what you'll need to make them the way we did at home (school was a different story):
1) Coffee filters
2) Food coloring (food coloring stains clothes and skin so be prepared for you and your kiddos to have colorful fingers for a few days). You could also do this project with liquid watercolor (less mess) but I didn't have any on hand.
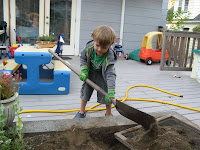
3) Spray bottle with water (Tip: get a small one in the travel section so it's easy to handle for small hands - notice the behemoth bottle Monkey is using)

4) pipe cleaners
The cool thing about coffee filters is that they're absorbent so it's fun to see how the color bleeds. We experimented with wetting before and after the color was applied. Wetting the filter first and then dropping on the colors is the most spectacular so I'd save that for last. Here's how we did it.
(Wetting after)
1) Spread out a few coffee filters (you can do one at a time but we were making an "army" so ended up stacking about 5 at a time) - you'll need to thoroughly wet to get color on all the filters in the stack
2) Drip colors onto filters (we also experimented using daubers which was fun but not as dramatic or as satisfying as dripping the colors)
3) Spray with water and watch bleed (you'll need to wet through if you are making more than one at a time)
(Wetting first)
1) Spread out a few coffee filters
2) Spray filters with water - completely wet or partially wet to see how the color reacts differently
3) Drip colors onto filters

Monkey really liked wetting first and dripping after. It was definitely the most dramatic reaction as the colors bleed immediately and give a great batik effect. The natural progression of this project led to a discussion on how colors mix and a slight introduction to primary/secondary colors. I think you could really go crazy with that with an older child. Monkey really likes to make brown more than anything.
4) Set filters aside to dry. (We let them dry in their stacks and separated after they were dry so they wouldn't rip - Monkey loves the spray bottle so they were saturated).

5) Now you just need to twist a pipe cleaner around the center and create the antennae. You can either accordion-fold and twist the pipe cleaner in the middle or I found scrunching by hand was easier and faster. Then fluff the wings a bit. I was also informed that butterflies have FOUR wings so after that we made a bunch with four wings. All you need to do for that is stack two scrunched filters and tie together with the pipe cleaner. Then flatten out the wings.
We hung our finished butterflies with fishing line. Cheap and easy room decor - watch out Martha!


